How To Add Custom Font In Ella 6.X
"Please note: This tutorial provides technical instructions and is not covered by our free support service. If you require assistance, please open a ticket for custom work requirements."
If you have your own font files, then follow these steps to include the font in your theme:
1. Prepare 2 files woff, woff2 of the font you want.
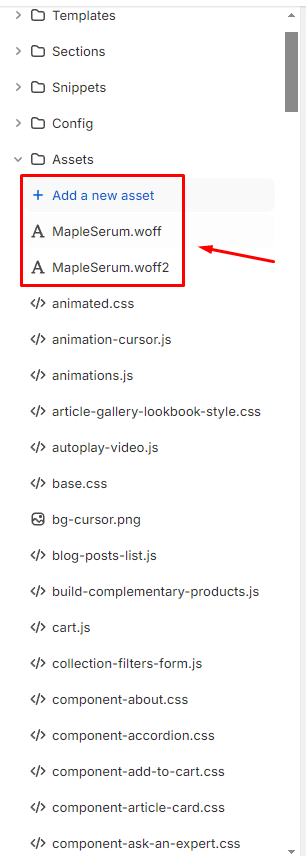
2. Upload these 2 files to the Assets folder in Edit Code:
3. Create a @font-face CSS rule so that you can reference the font. Use the asset_url filter to output the URL for the font file:
@font-face {
font-family: "Font name";
src: url("{{ '[font-file-name]' | asset_url }}") format("[font-format]");
}
Example:
@font-face {
font-family: "Maple Serum";
src: url('{{ "MapleSerum.woff2" | asset_url }}')format("woff2"),
url('{{ "MapleSerum.woff" | asset_url }}')format("woff");
}
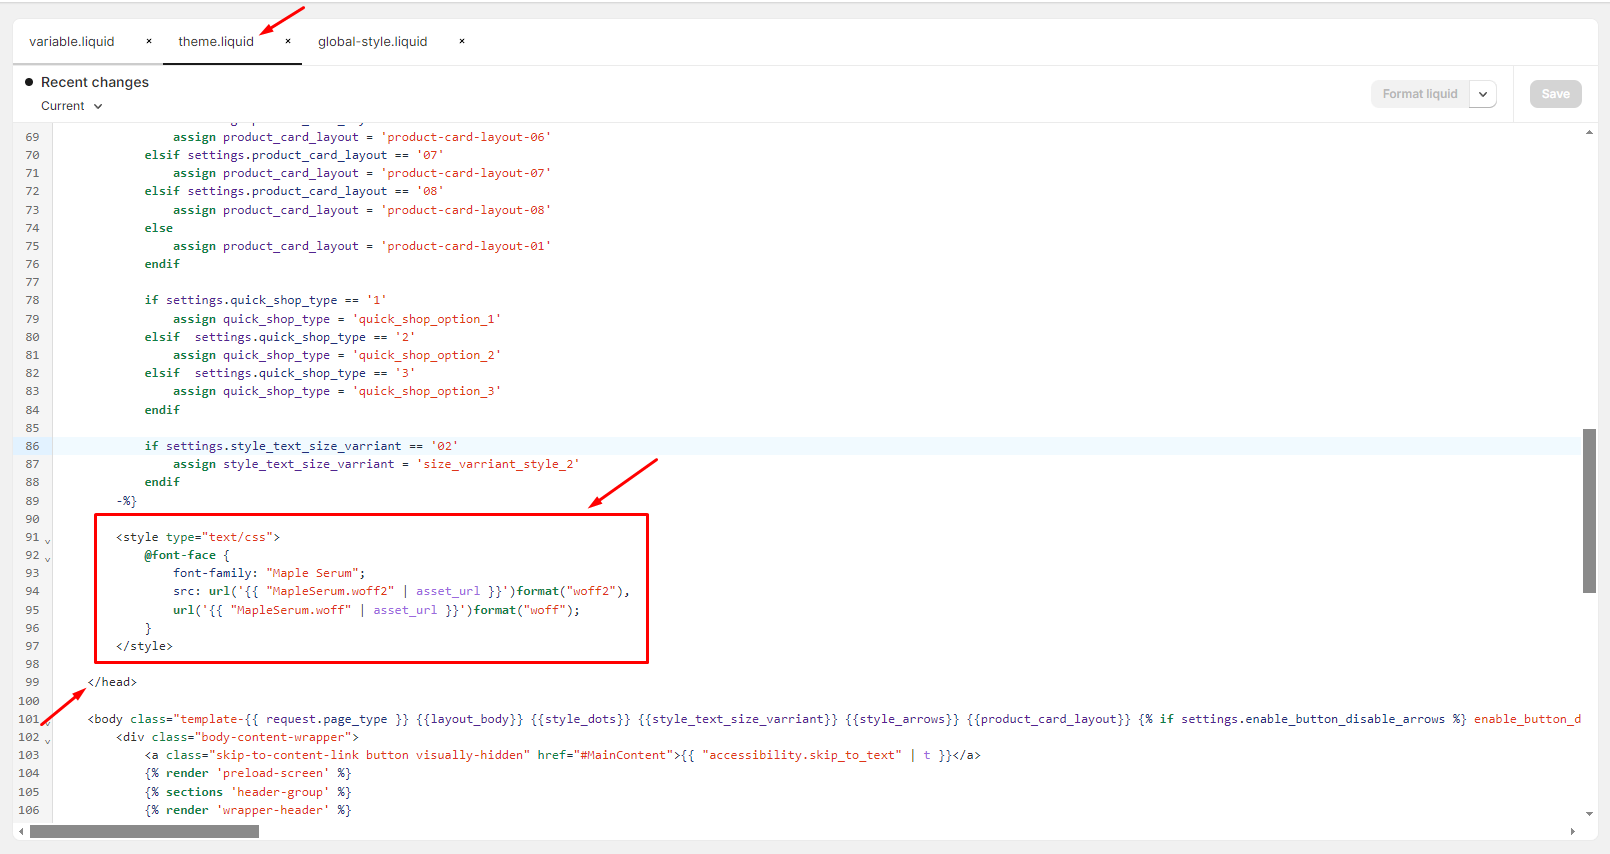
4. Layout -> theme.liquid -> Create pair of style tags, paste the @font-face code in between and place it above the closing /head tag:
5. Use custom fonts:
- You’ll want to decide what html elements or classes will use these fonts. You need to define where you want the font used.
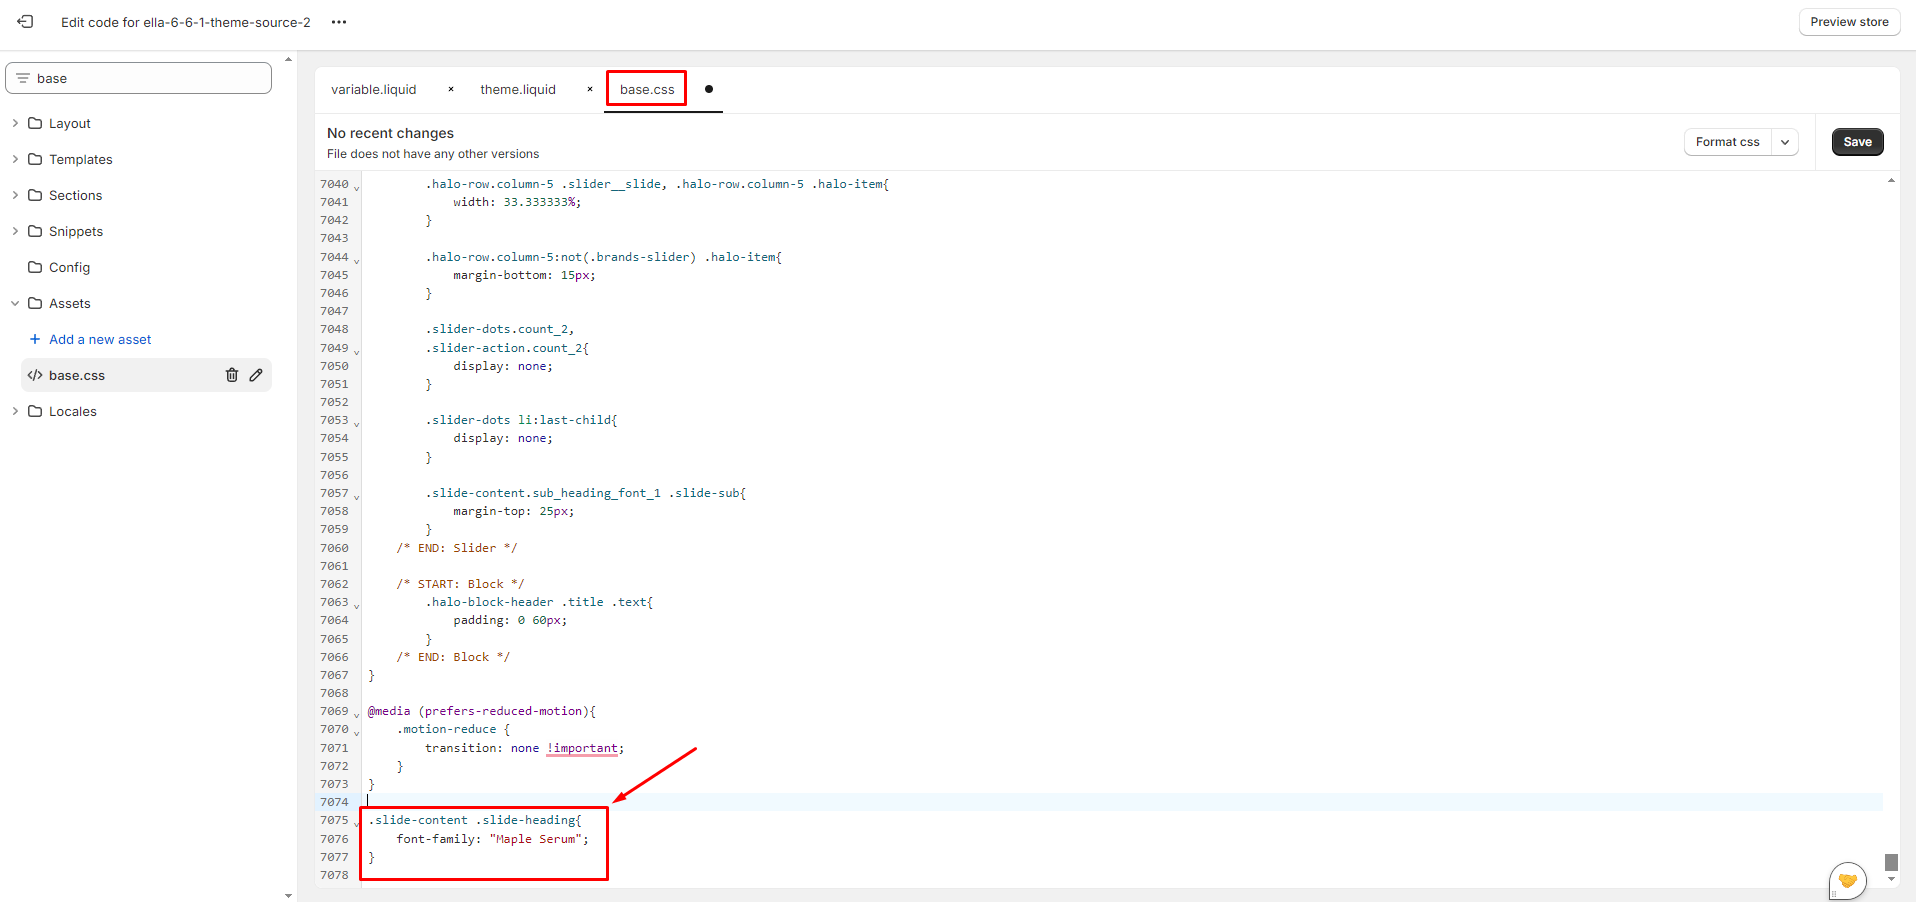
- If the font custom hasn’t been displayed, you must add extra properties “!important”.
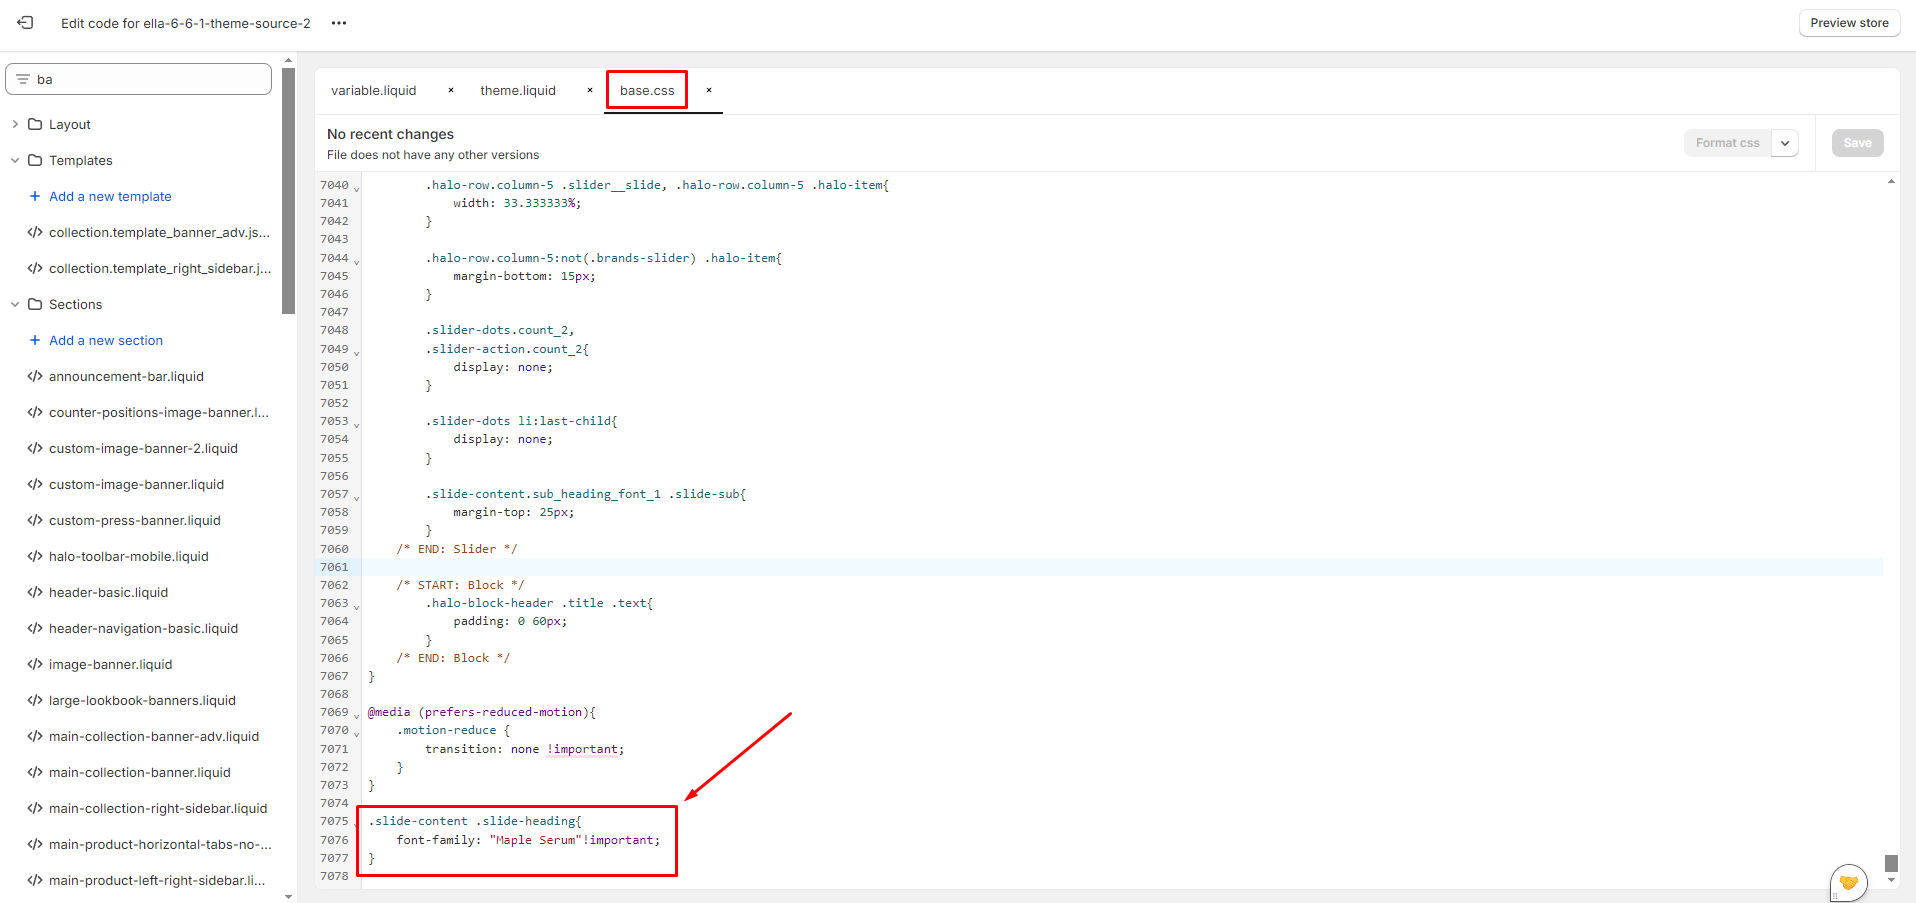
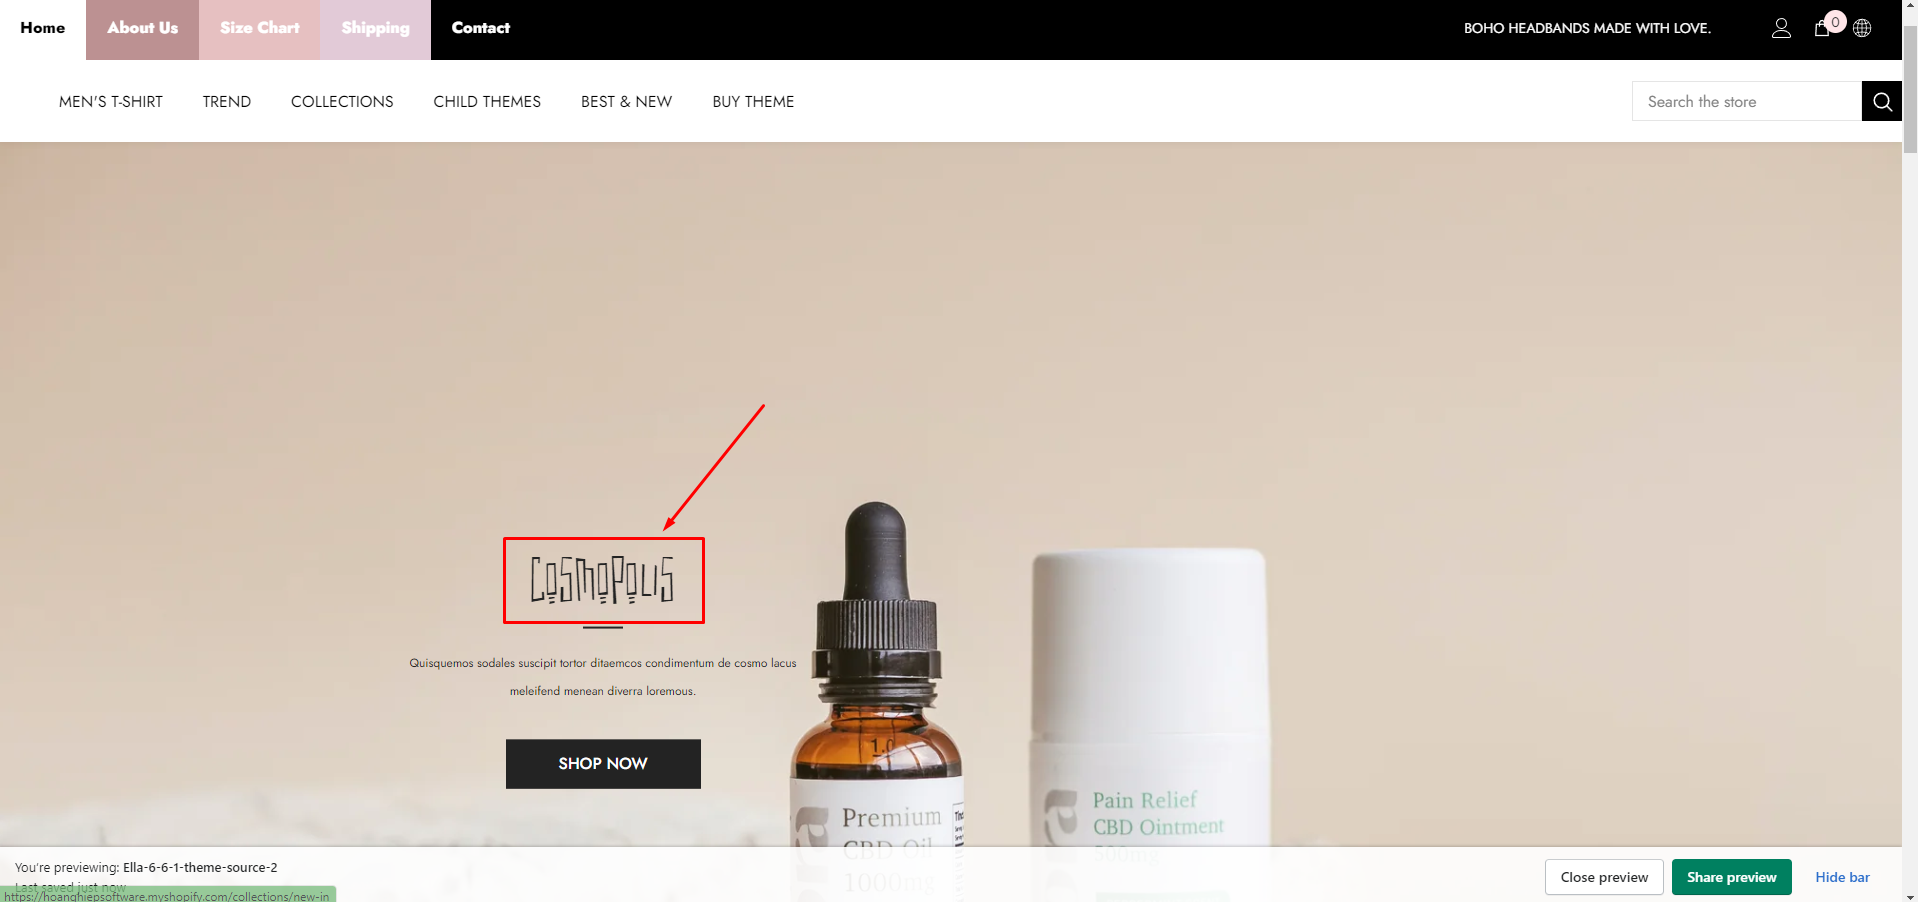
Results:
